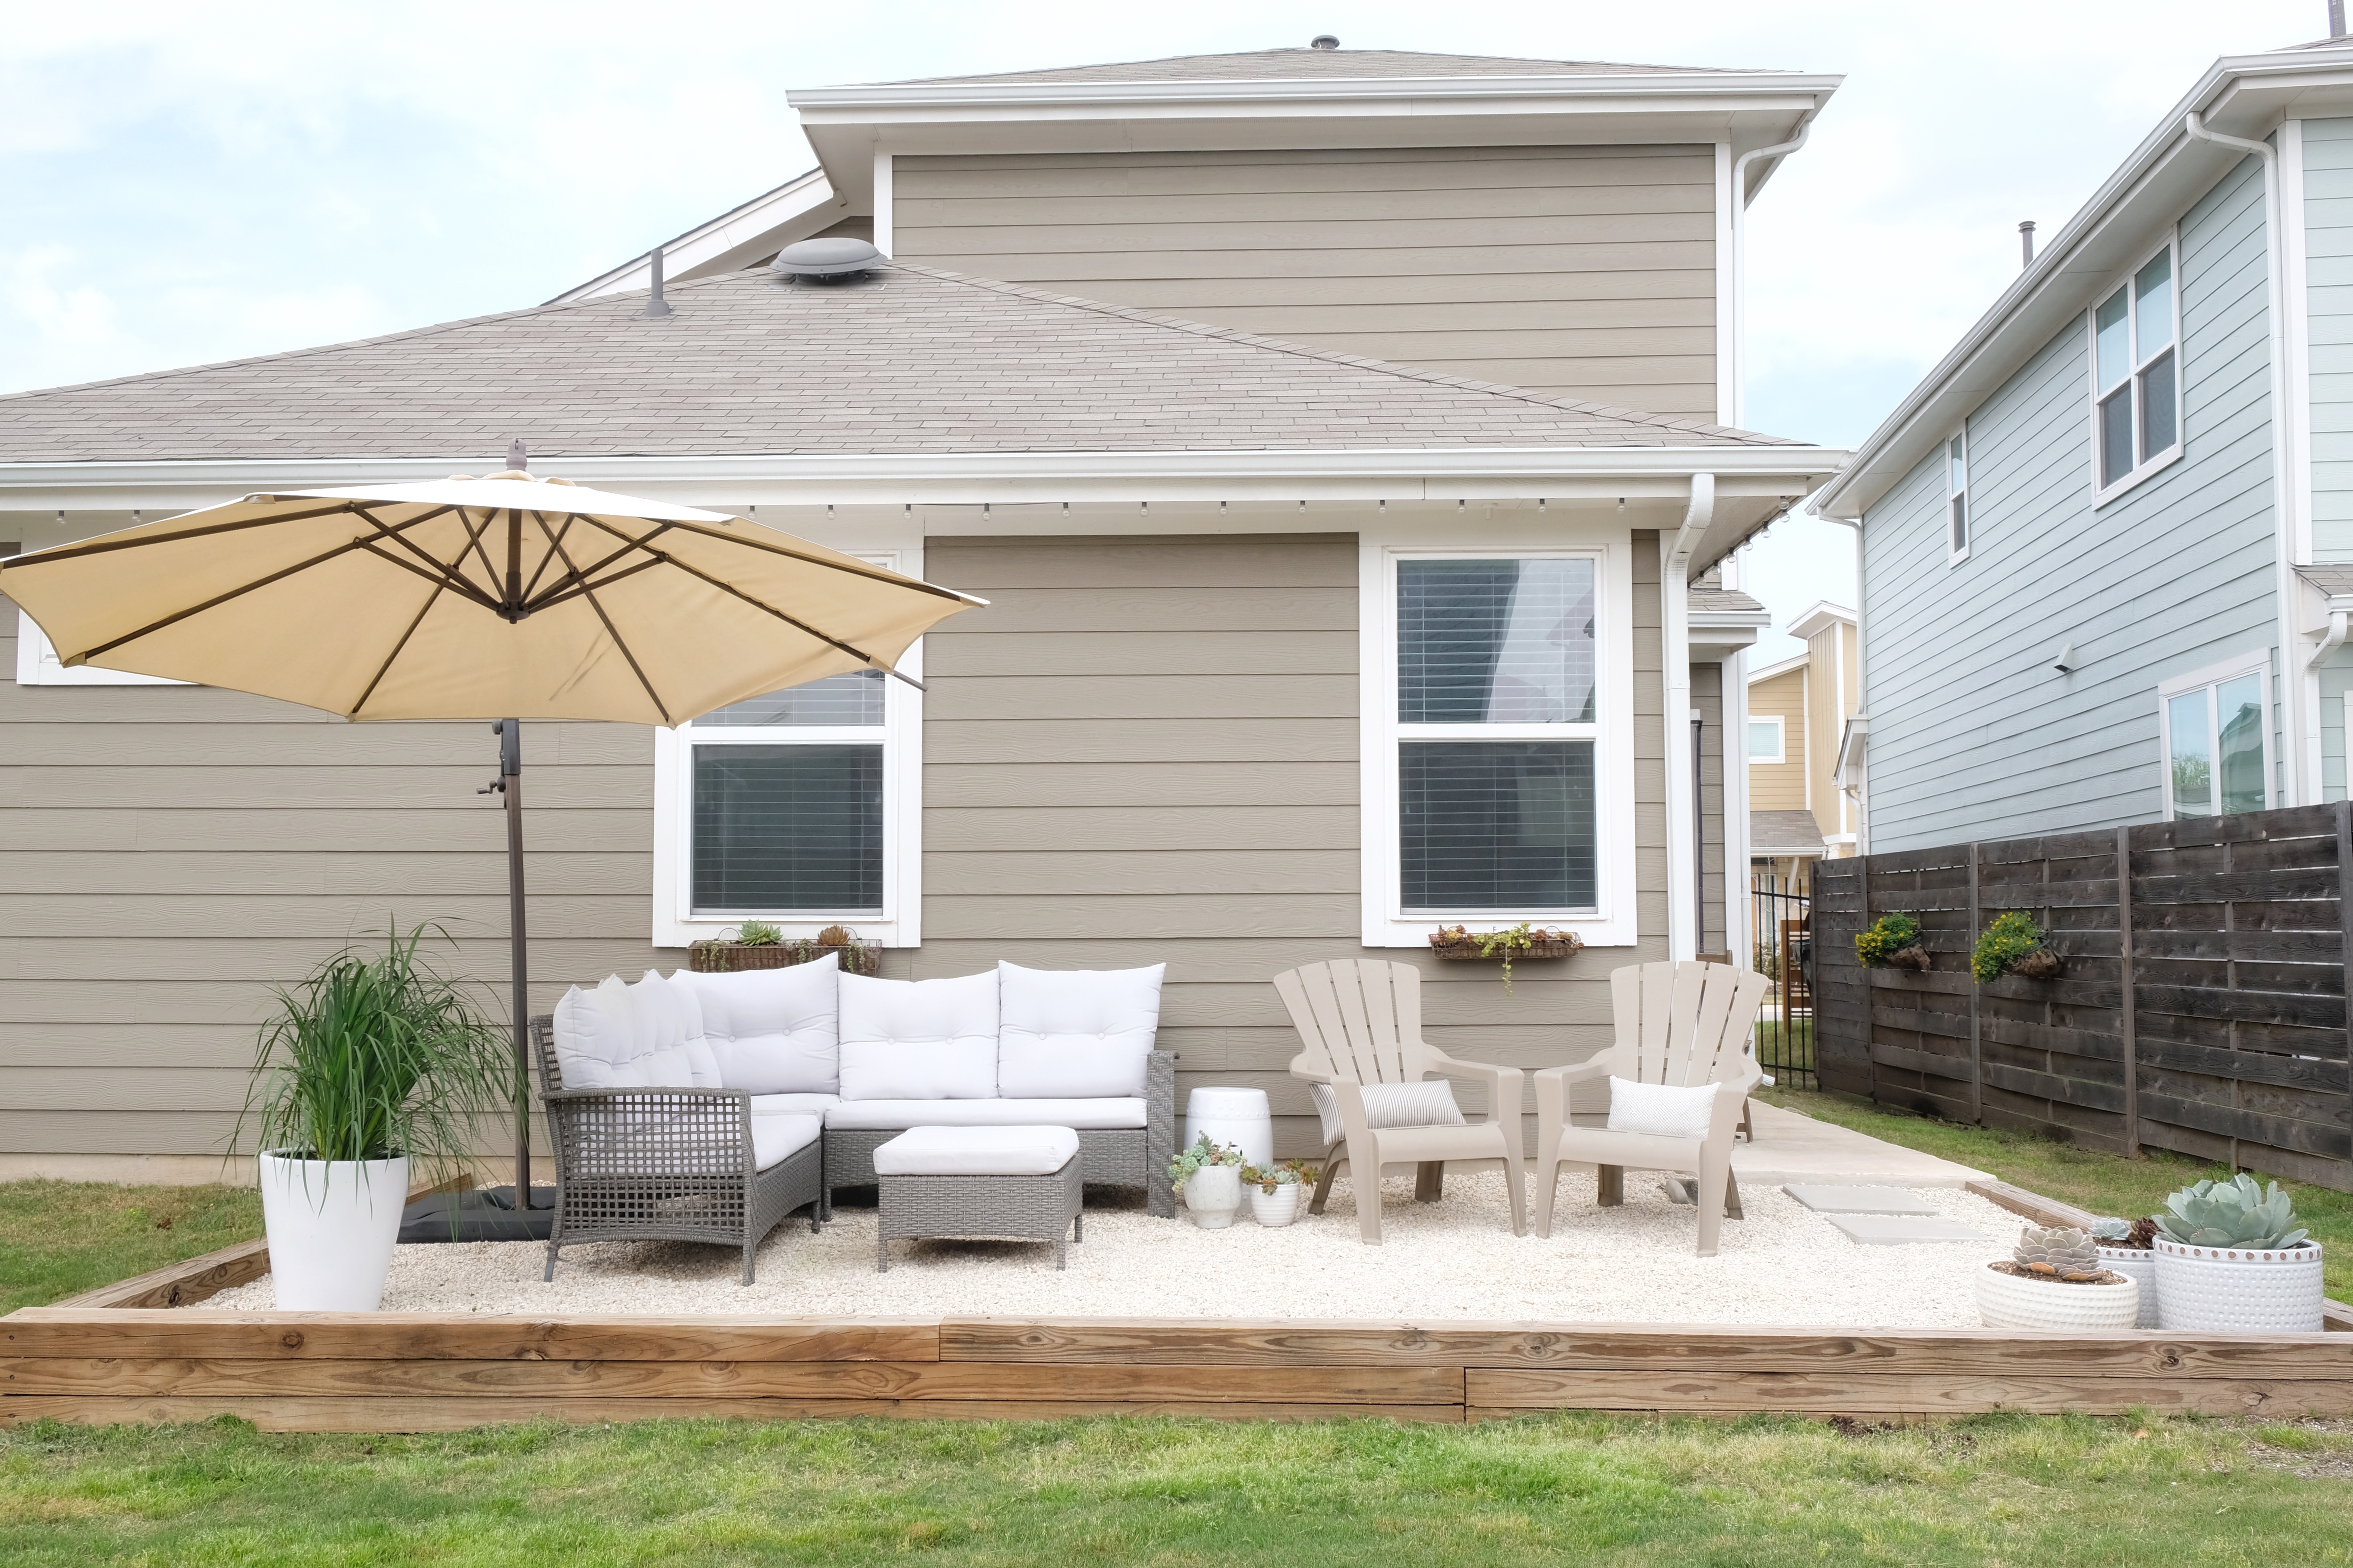
Our new-build rental home came with a bare backyard and no usable patio space. We didn’t want to invest much into a home that wasn’t ours, but knew we’d want to enjoy it during our time here. We came up with this easy, affordable DIY solution that cost us only $500 in materials and one day’s work.
Disclosure: This post may contain affiliate links which could earn me a small commission if you buy something after clicking one. This doesn’t cost you anything and serves to support this site and all of the hard work that goes into it. Thank you for being part of this online neighborhood!
Finding an Affordable Patio Solution
When we moved in to our current rental home, the backyard was a completely blank canvas. The house was barely a year old and the owner hadn’t put any time or money into the outdoor space. Having grown up in South Florida, outdoor living is a big part of our lives. We knew that we needed to create some usable space in the backyard in order for us to truly enjoy this home.
[Want to see inside? Tour more of our rental home here.]

We explored several options including pouring a concrete patio or having a deck built. However, we quickly learned that these solutions cost far more than we were willing to spend on someone else’s property. Luckily, we didn’t have to look far for inspiration. Austin is a city that loves it’s gravel patios. It’s not uncommon to find them in residential spaces, restaurants and parks. They’re everywhere! We started doing our research and, with the help of my dad, came up with a plan.

I didn’t have the foresight to take pictures during the project but hopefully the visuals and steps below are still helpful!
Designing The Gravel Patio
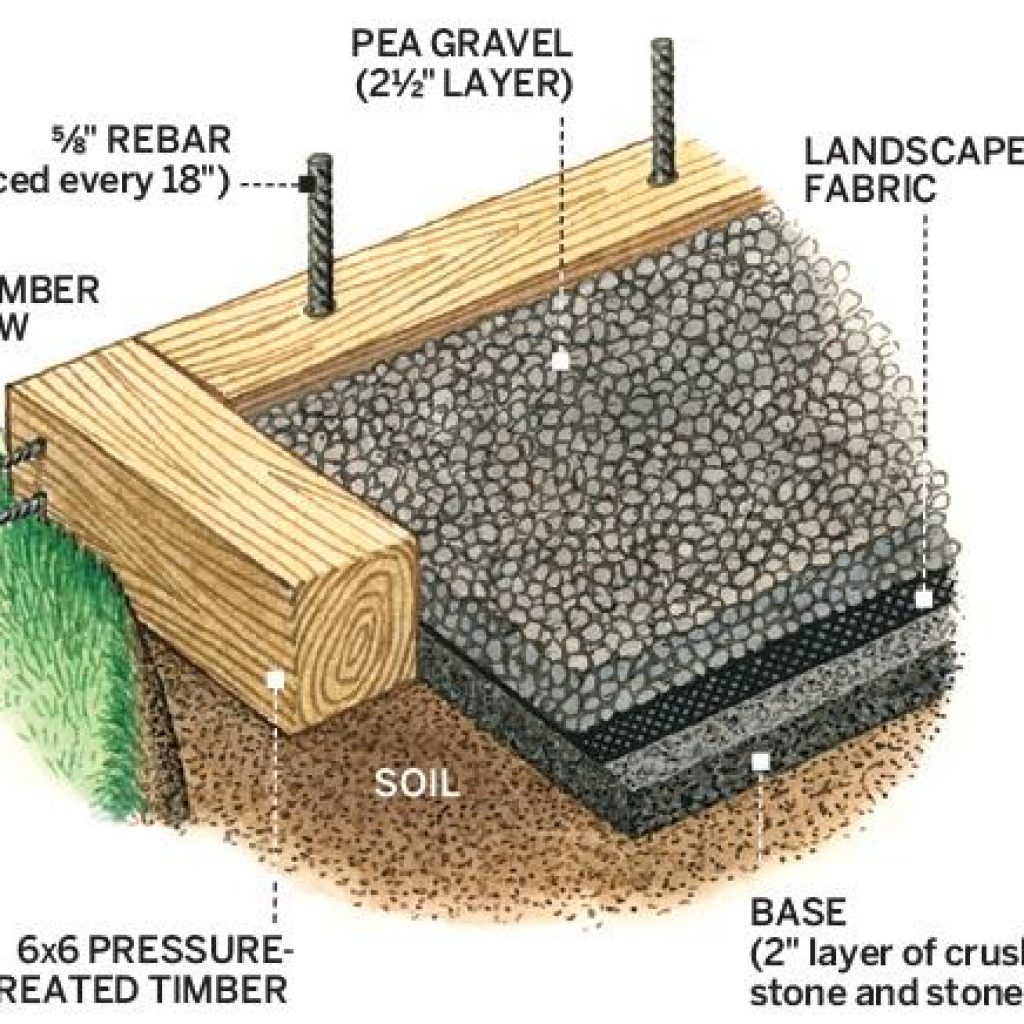
First, we determined how we were going to construct the patio. we found this really helpful diagram and while we didn’t follow it precisely, it did serve as a great guide.

Photo Source
Then, we measured out our desired patio space, connecting it to the existing walkway that leads from the back door. Our yard is fairly small so we kept the overall size of the patio pretty modest. We knew we wanted room for a small couch, some lounge chairs and maybe room for a small fire pit. This helped us determine the patio size and we made sure our final measurements could fit these items comfortably.

Choosing Materials for The Gravel Patio
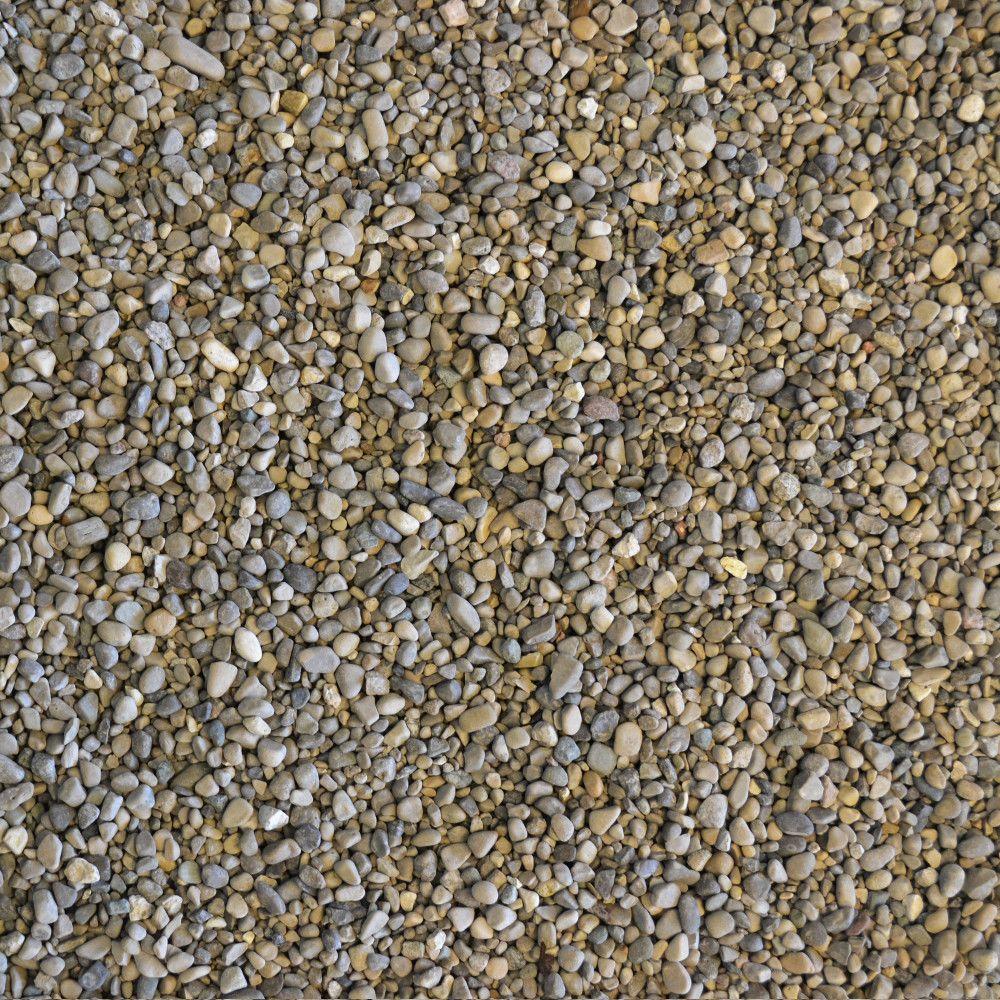
When I spoke to our local rock yard, we discussed the differences between pea gravel and other options. Pea gravel is essentially a bunch of smooth, multicolored pebbles with an overall brown appearance. While it’s more comfortable to walk on with bare feet, there are a few cons. First, the smoothness of pea gravel means that they are too slick to pack down, so everything you put on the rocks (i.e. your furniture) will just sink into the gravel. Secondly, it holds heat. With Texas sun, this was a no-brainer. Finally, from an aesthetic standpoint, pea gravel variations are usually brown and not the most sightly.

We opted, instead, to go with 1/2″ crushed limestone. While it’s not great for bare feet, it packs down very well, doesn’t retain heat and remains a nice bright white color. The people at the rock yard also told us that base layers (like the crushed stone and stone dust shown in the diagram) would not be necessary with limestone.

We ordered the rock to be delivered to us on a Friday evening so that we could get up Saturday morning and get right to work.
Building The Patio Border Wall
For the border, we used 6 x 6 pressure treated lumber cut to our specs. Our yard is not level (it slopes down and to the right) so the first thing we did was dig out a trench for our border beams and ensure that the ground at the bottom of this trench was level all the way around. This meant digging out more ground where the yard was higher and less where it was lower.

We could have dug up the entire space and leveled the entire area. However, the slope of our yard was intentional for water drainage and we didn’t want to disrupt the drain field. The great thing about gravel is that it still allows water to filter through to the ground and drain out properly.

Once our trench was dug out, we stacked one, two or sometimes three 6 x 6 beams on top of one another to create a level border wall all the way around the perimeter.

Just as the diagram depicts, we used 5/8″ rebar to hold secure the base layer of timber into the ground. If you are using 6 x 6 timber, you’ll want rebar that is about 18″ long (i.e. so that it goes about 1′ into the ground.) We then used long timber screws vertically to secure any additional layers of timber on top of the base layer and horizontally to join the corners together.
Preparing For The Gravel
Then, we sprayed vegetation killer over the entire patio area and laid down two layers of tarp to prevent any future weeds and grass from growing up through the patio.
Now for the real workout. We wheeled barrel after barrel of rock into the patio pit. Once we were done, we used long planks of scrap wood to drag push the rocks around and flatten things out. You can also rent a manual lawn roller or an electric compactor to tamp down the rocks, but we didn’t think this job really required it.
An Easy, Affordable DIY Patio Solution
All in all, we spent roughly $500 on materials, an additional $600 on plants and furniture. We gathered some materials ahead of time but completed the actual work in a single day. We knew we’d be in the house for a total of three years so this was a number we were comfortable with. For a space that gets used almost daily, it was completely worth it!


Plus, our new patio quickly became the talk of the neighborhood and we still get complimented on it to this day. It’s certainly a nice pat on the back!


Materials
- String & Yard Stakes to outline your space
- Wheelbarrow
- Shovel
- Edging Spade (for creating straight lines when digging the trench)
- Level
- Gloves
- Vegetation Killer
- Landscaping Fabric / Tarp
- Drill and Bit for inserting 5/8″ rebar into lumber (you can rent these)
- 5/8″ Rebar cut to size (they will cut in-store)
- 10+” Lumber Screws (you’ll need the right drill bit for these too)
- 6 x 6 Pressure Treated Lumber cut to size (they will cut in-store)
- 1/2″ Crushed Limestone
- Pavers / Stepping Stones (optional)

Furniture & Decor

Shout out to Dad for making this one possible!
Want to see inside? Tour more of our rental home here.

15 COMMENTS
Leave A Comment
This site uses Akismet to reduce spam. Learn how your comment data is processed.
© 2020 gold coast canvas. all rights reserved.

Patricia | 6th Apr 22
We are getting ready to do the same thing. You do not state in your step-by-step that you dug up the yard. Is that correct? Which means you put the gravel on top of the old (now dead) grass? Thank you.
admin | 6th Jul 22
Hi Patricia,
So sorry for the late reply! Correct. We were advised that we did not need to dig up the grass for our particular project. We used vegetation killer and then laid down weed barriers.
Best,
Danielle
Beautiful Diy Pea Gravel Patio For Your Home - Property Design Ideas | 12th Nov 20
[…] Patio diy an easy affordable gravel patio by Goldcoastcanvas.com […]
Ashley | 9th Aug 20
Thank you for your reply.
🙂
Also, one more quick question, how much pea gravel did you end up purchasing and using for this?
Thank you in advance,
Ash
Austin House | gold coast canvas | 30th Jun 20
[…] backyard […]
Ashley | 2nd Jun 20
What color limestone did you use? In the overall photos it looks white, but in the up close photo, it looks gray?
admin | 2nd Jun 20
Hi Ashley! Ours was white but you’re right, in the rock yard’s photo it looks gray! The color in my photos is true to real life – it was white and stayed very clean and bright.
SMR | 6th May 20
Hi, this project is beautiful. For your designated patio space, did you have to dig the grass up before you laid the crushed stone and tarp?
admin | 10th May 20
Hi there! Thank you so much! We consulted with the rock yard that we purchased the gravel from and they said that part wasn’t necessary for our particular space. Texas soil is already hard and rocky so there wasn’t a need for the base layer of crushed stone. If we had to put down crushed stone, then we would have likely had to dig up the grass first. Instead, we just laid down a layer of vegetation killer and tarp and it worked great! Let me know if there’s anything else I can help with.
Tiffany | 10th Apr 20
How much did this cost you?
admin | 13th Apr 20
Hi Tiffany!
This cost us about $500 in materials and one day’s worth of work (with three people.) I believe the gravel accounted for roughly half of the cost. Let me know if I can help in any other way!
Jack | 9th Apr 20
I have a flat surface for the most part, how far do you dig down?
admin | 13th Apr 20
Hi Jack,
Great question. The recommended depth for the gravel is 2″, plus another 2″ inches if you’ll be using a layer of crushed stone as your foundation. (Our rock yard told us we did not need crushed stone in Texas since the soil is already very hard/rocky.) Let me know if there is anything else I can do to help!
Deborah | 25th Jun 19
What is the size of the back rectangle (not the patio area along the side of the house). Thanks!
admin | 1st Jul 19
Hi! It’s 20′ x 10′.