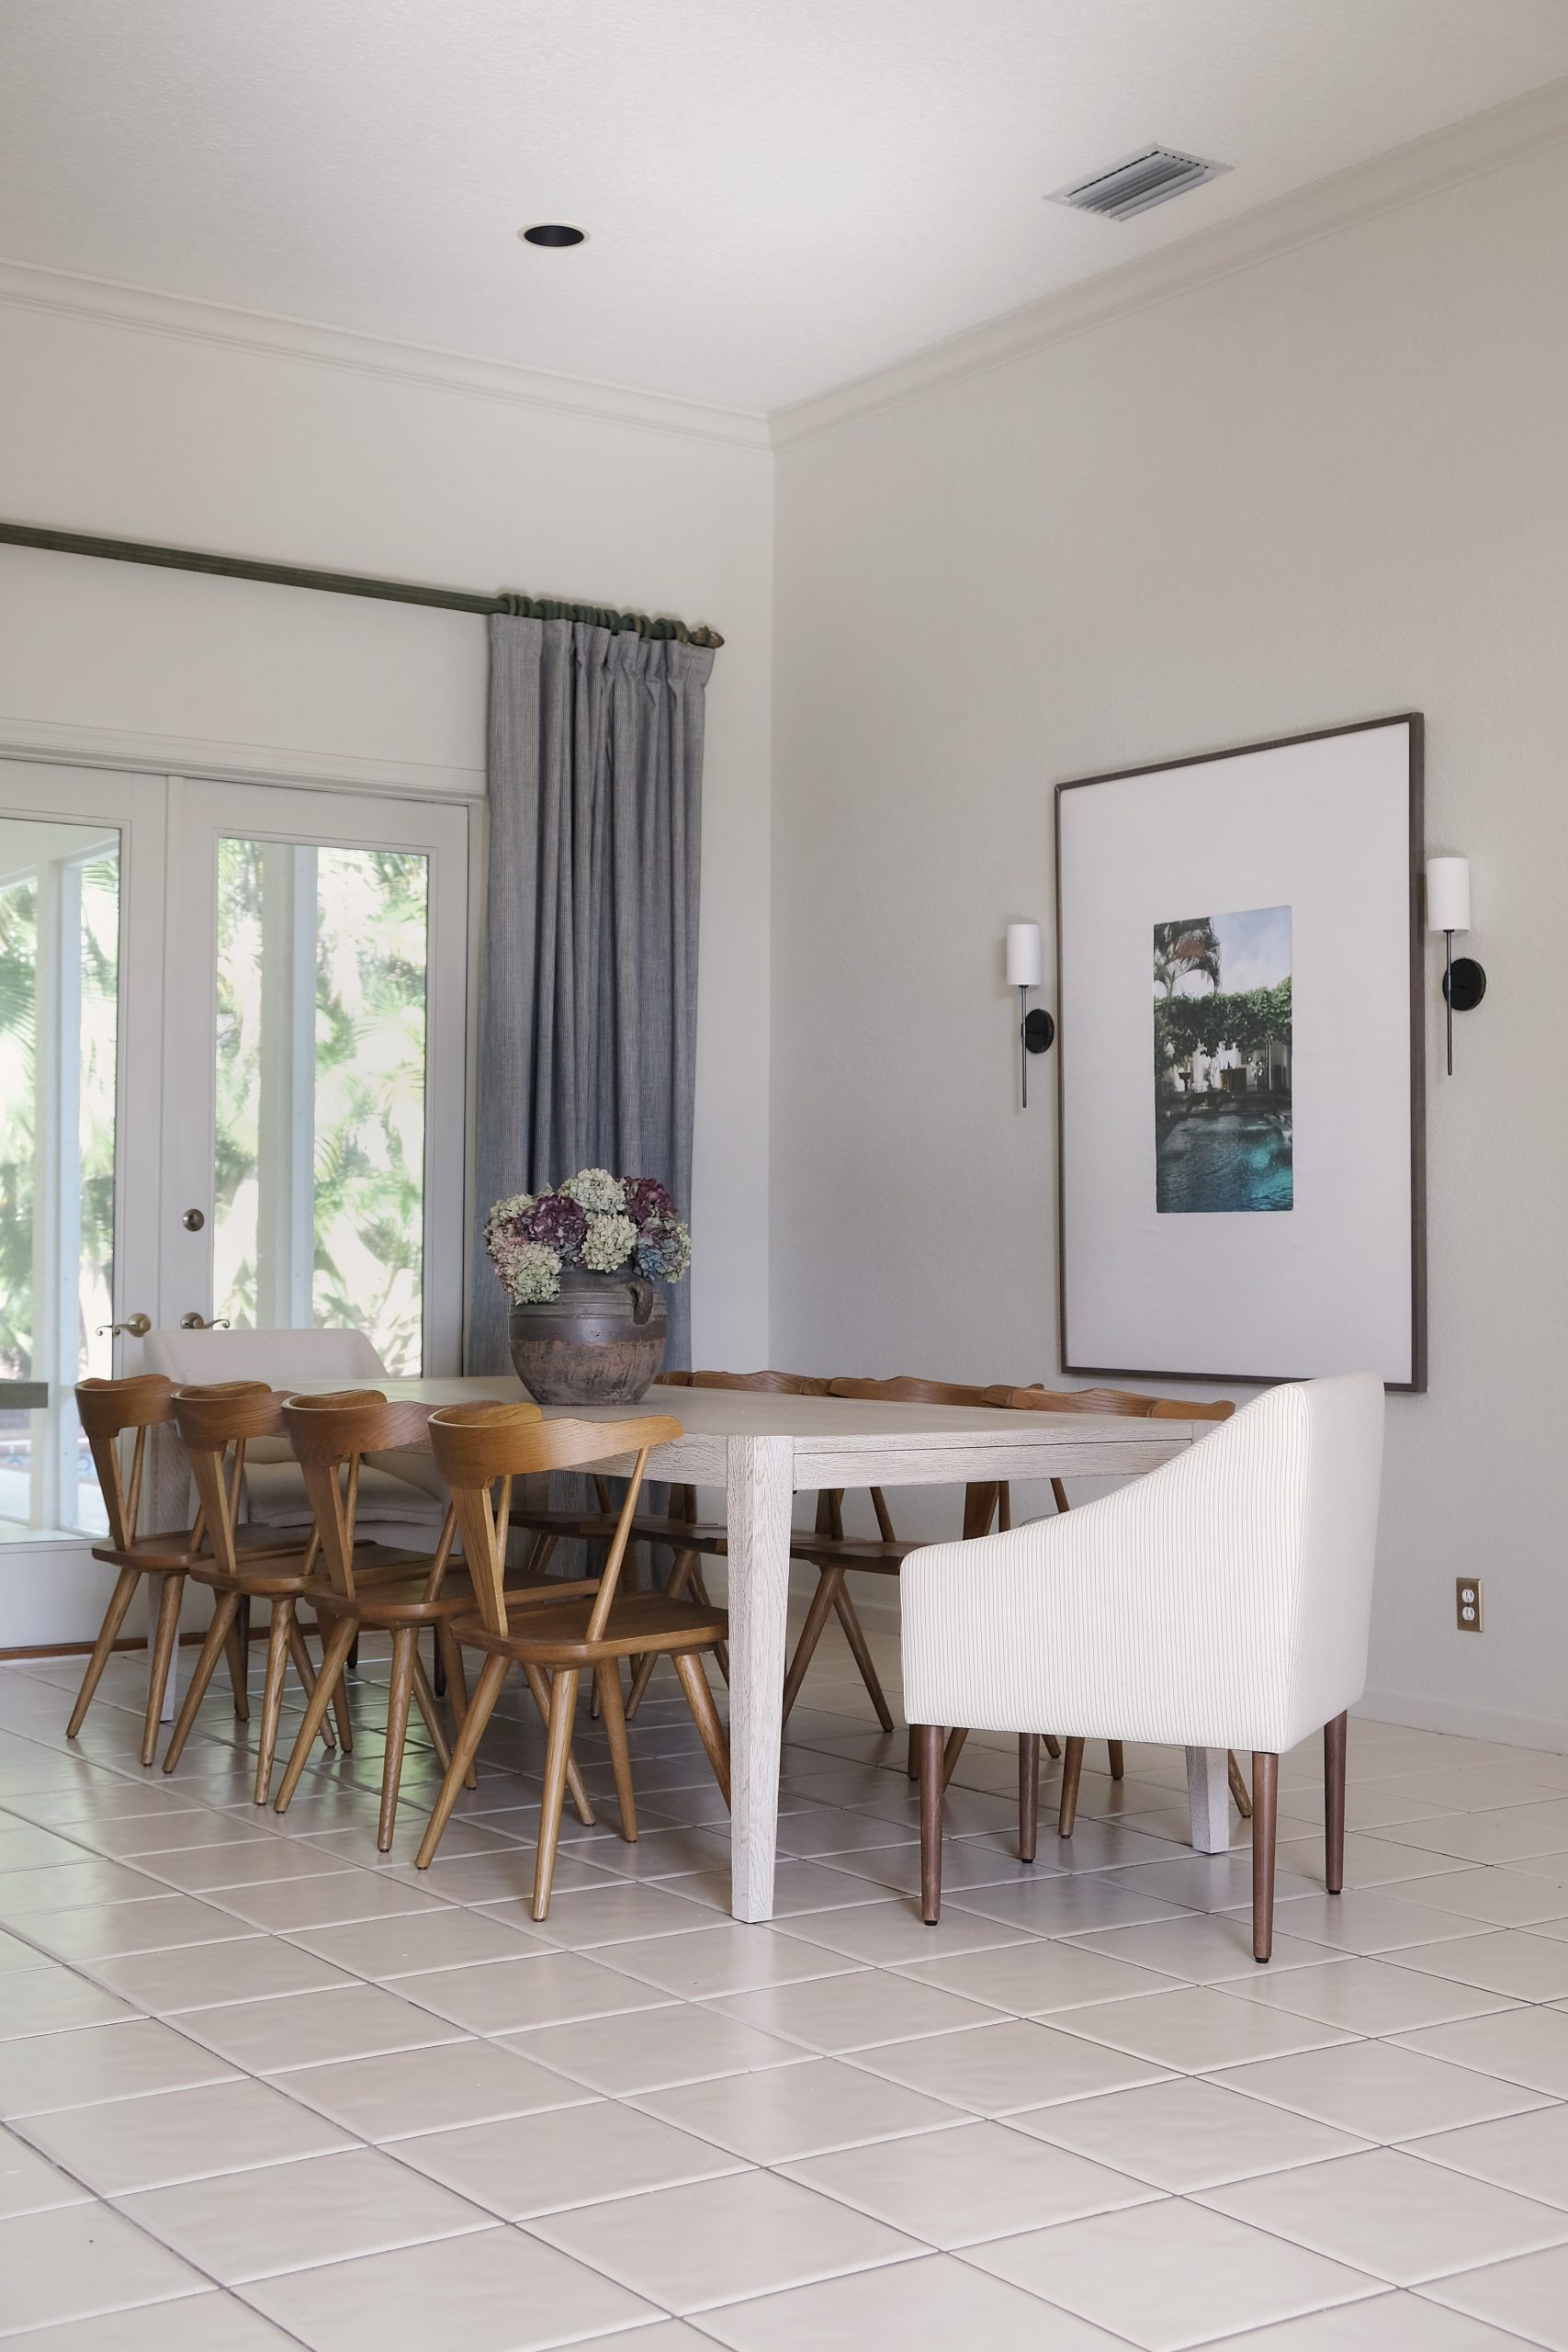
The frame discussed in this post was gifted by Pictureframes.com. All opinions are my own.
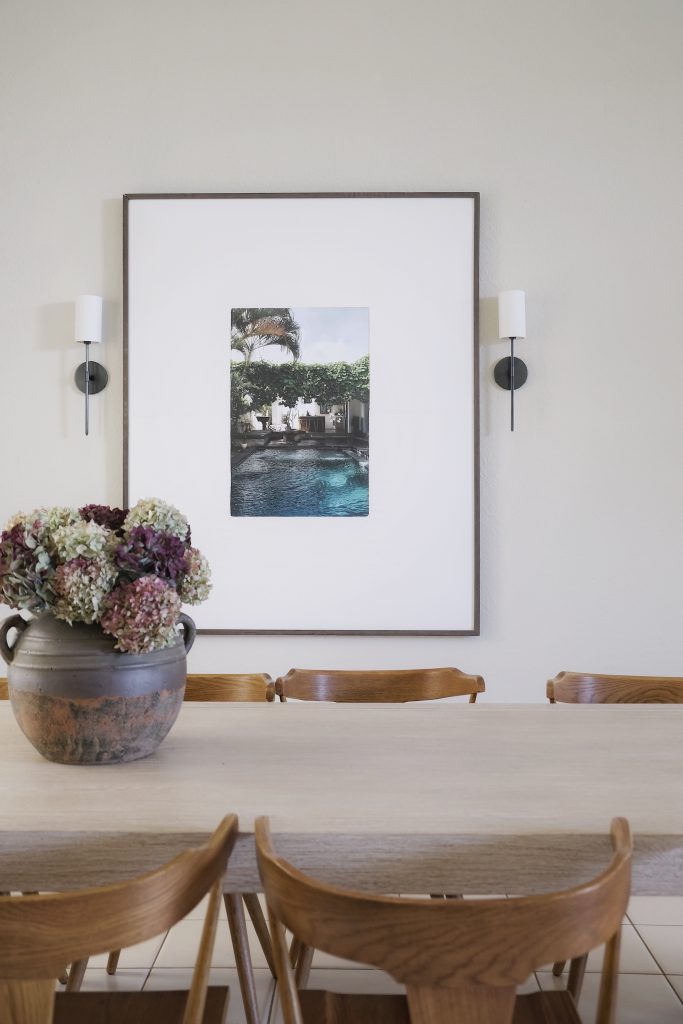
A quick scroll through photos of our homes and it’s pretty apparent that I love large-scale art. A single, oversize piece is a great way to fill an empty wall and add interest without adding visual clutter to the space. I especially love a dramatically wide mat to really draw some quiet attention to it.
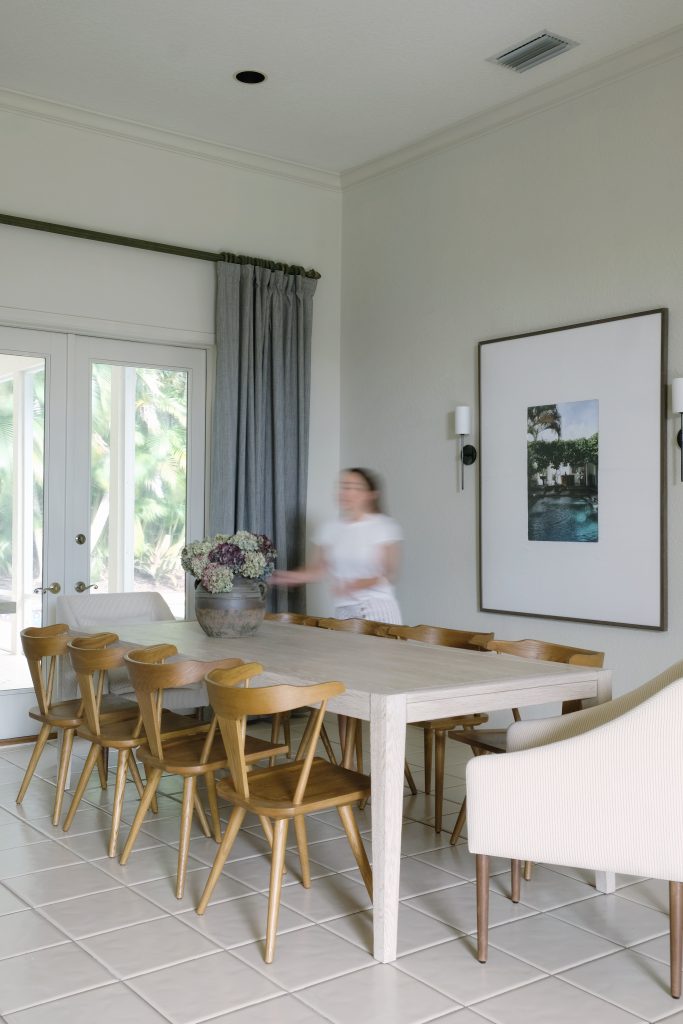
No matter what crazy idea I dream up, it seems Pictureframes.com is always up for the task. In fact, nearly every single art piece in our home is framed in a pictureframes.com frame. They have fully customizable frames and mats and can even print your art and ship your piece fully assembled! When I came up with the idea for this dining room statement piece, naturally, I thought of them and reached out to see if they’d want to help with my project.
Choosing the Art
Since our dining room is right off our entry, I felt that it was important that the piece I chose set the tone for our home. I wanted it to say “this is how we want you to feel in this house.” I also wanted it to be really personal to us. We already have many beautiful art pieces from artists we admire, so I wanted to make room for a personal photo instead. I chose a photo that we took on previous trip – a place that became extra special to us because we actually hadn’t intended to go there at all! The pandemic broke out after our departure and our flight was re-routed when borders suddenly closed at our original destination. We were anxious, but also overwhelmingly grateful to have such a safe haven to ourselves.
(Quick tip: since the rest of our house is full of muted earth tones, I turned down the saturation on this photo just a touch. It feels like it belongs in the space yet still makes a statement!)
Customizing your Frame
This is the fun part. Pictureframes.com has hundreds of frame options to choose from. You can purchase a standard, ready-made frame or customize it to your particular piece. They are one of the only online framers that offers large-scale frames – up to 83″ x 83″!
For this piece, I chose a distressed Whiskey Brown Wood frame (BPC8 – found here) which would mirror the dark wood buffet across from it.
DIY Oversize Linen Mat
I also love utilizing an extra wide mat to frame out my photos and art. To me, it’s an easy way to visually “tone down” a piece while simultaneously calling more attention to it. This is also a great trick for mixing color schemes and genres in the same space because it gives the eye a rest between each piece and reduces “clashing”.
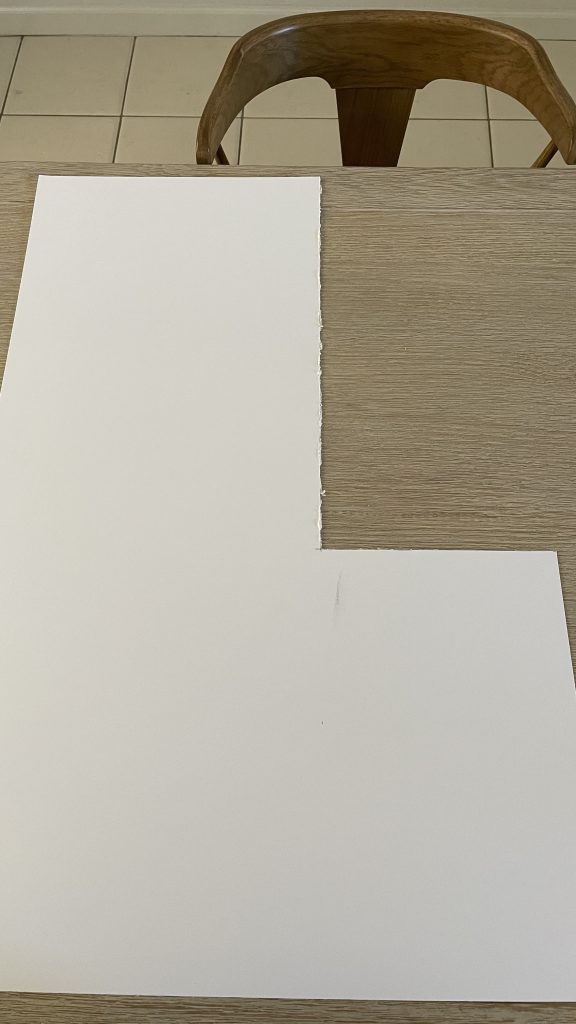
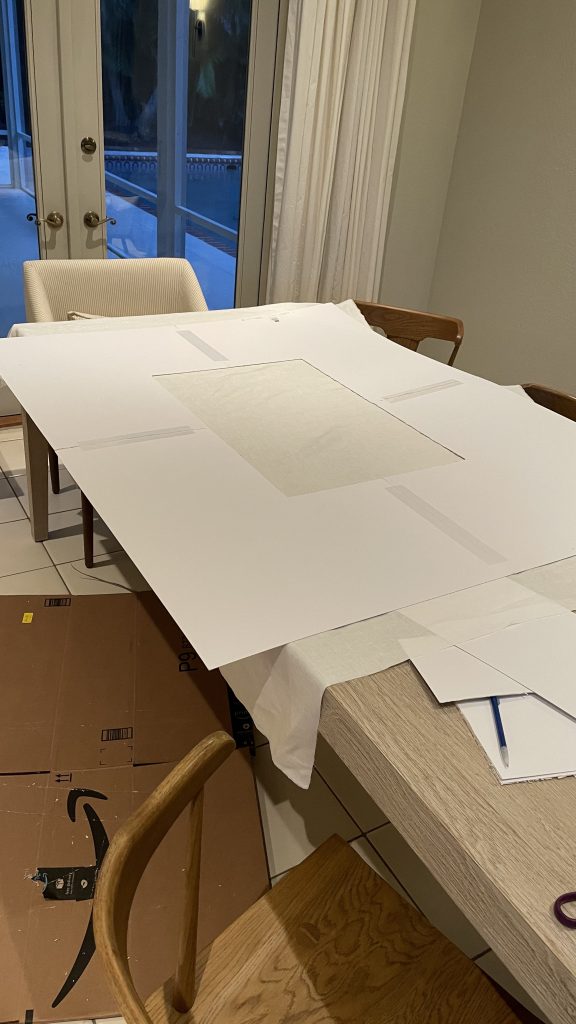
It’s difficult to find matting for a frame this large, so I opted for a bit of a DIY. I picked up four 2’x3′ mat boards from my local craft store. I pieced them together to create one giant matboard and then cut it to fit in my frame and cut out the center for my photo (the photo measure 20″ x 30″.)
Then, I used double-sided fabric tape to adhere a large piece of linen fabric to the board. I didn’t think of this ahead of time, but because I chose a thin, light colored fabric, some of my matboard seams showed through. I had to cover them with paper to conceal them. If you choose a heavier or darker fabric, you should be fine. I opted for a simple look, but you could certainly experiment with different textile materials, patterns and colors!
Assembling Your Frame
Wrestling with a frame this large will require some help (I could barely get my arms around it to pick it up!) Pictureframes.com will provide you with hanging hardware and instructions. Here are some quick tips to make the process even easier:
- Lay the frame face down on a soft surface (lay cardboard or a blanket down on the floor for a frame this big!)
- Remove the protective film from both sides of the acrylic and lay it in the frame.
- I used several dabs of super glue on the inside of the frame to hold the acrylic in place (I think hot glue would have worked better, though.) With a piece this large, it can easily slip out while you’re assembling which will make the whole process harder.
- I taped my photo print into place on the mat and then used some of my extra fabric tape to secure the matboard to my cardboard backing. Again, the sturdier you can make your large pieces while working with them, the easier this will be.
- Once you’ve got everything in the frame, it’s time to install the hardware! I installed extra hanging wires and pulled them as tight as possible to make absolute certain that the edges of the frame wouldn’t bow when hung. The hardware was super easy to attach to the frame.
- Voila!

Looking for more? Subscribe below for my FREE Guide to Decorating
Related Posts
Austin House: Full Tour & Source List
A room-by-room source guide of our previous home, located in Austin, TX…
June 30, 2020Easy Upgrade: Painted Target Console
I snagged this already-beautiful console in white during a great sale at Target. I…
September 9, 2019© 2020 gold coast canvas. all rights reserved.

Leave A Comment