Guest Bathroom: Plans for our unplanned renovation
Hey, neighbors! You know the saying, “If you want to make God laugh, tell Him about your plans?” We’ve been learning the hard way how true this is. Brad and I went on our first real vacation in two years, only for us to get stuck for an extra 10 days while I recovered from COVID. When we finally made it home, we discovered the next wrench in our plans: water was coming through the walls in our guest bedroom. It took us nearly two weeks and multiple professionals to identify the problem…a drain leak in the slab under the tub in the adjoining bathroom. Yikes!
While we had always planned on renovating the bathroom, it was not a near-term project. (See this year’s renovation plans here and our original long term plan here)
Luckily, we had some other projects in the budget that we could pause on. I also had a design plan in mind already, so this allowed us to move quickly. When we moved in, I created mood boards for every room in the house because I wanted to keep my design choices consistent over time. It was a HUGE help to be able to pull up my moodboard and get started on the reno right away.
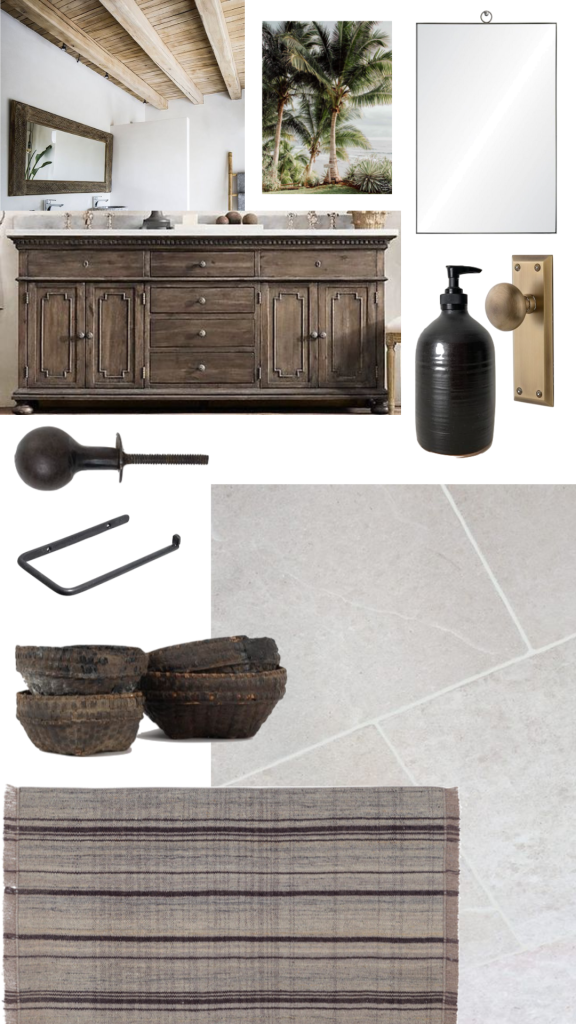
Here is my original mood board for the bathroom:
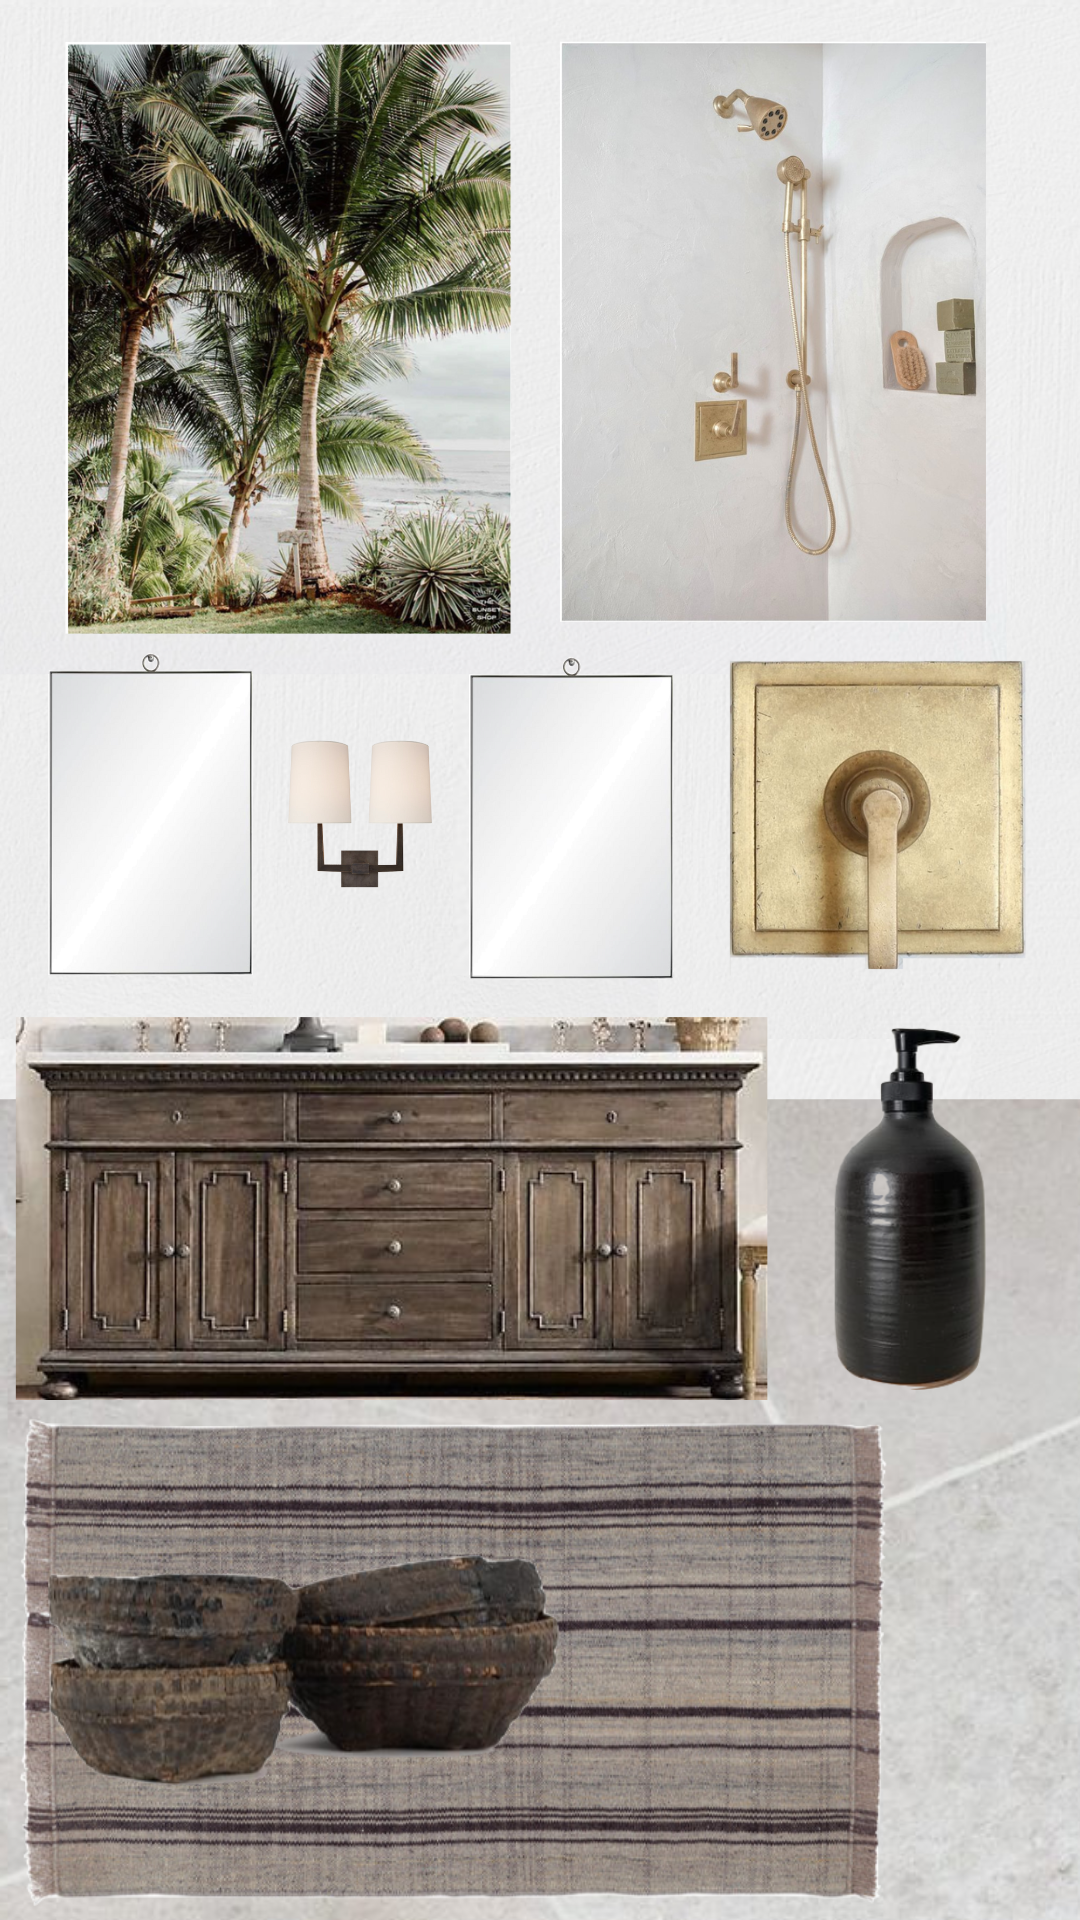
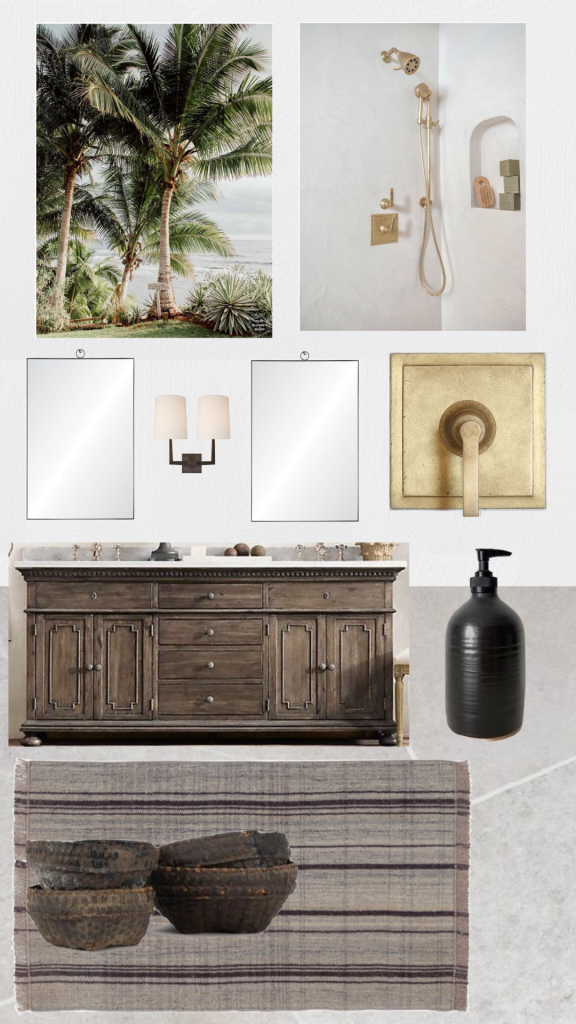
And here is the updated design plan:
Though we’re a long ways from the finish line, our home will eventually be a combination of a few styles. We love the feeling of a Balinese villa with pared back and organic design elements. This will probably be our prominent design style. I also love British West Indies and Spanish Revival styles which are both common here in South Florida. We’ll incorporate elements of each in our designs.
The Before
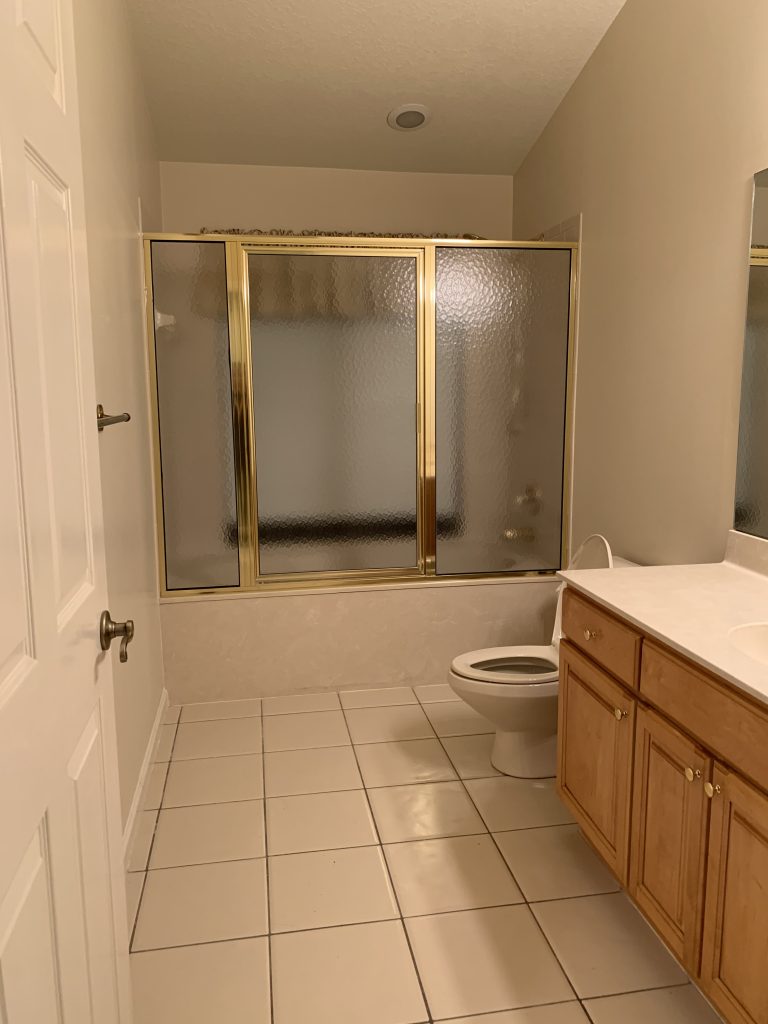
Floorplan
The floorplan will be shifting slightly. The existing vanity had a single sink and was 5 feet long, leaving more than the necessary clearance for the toilet (it was quite a stretch to the toilet paper!) It felt like a lot of wasted space, especially for a bathroom that is shared by two bedrooms. We’ll be moving the toilet about a foot closer to the tub so that we can accommodate a 6 foot vanity with two sinks. Moving the toilet is arguably the most expensive line item of this renovation, but we’re confident it’s a worthy change that makes sense for our future family and for resale.
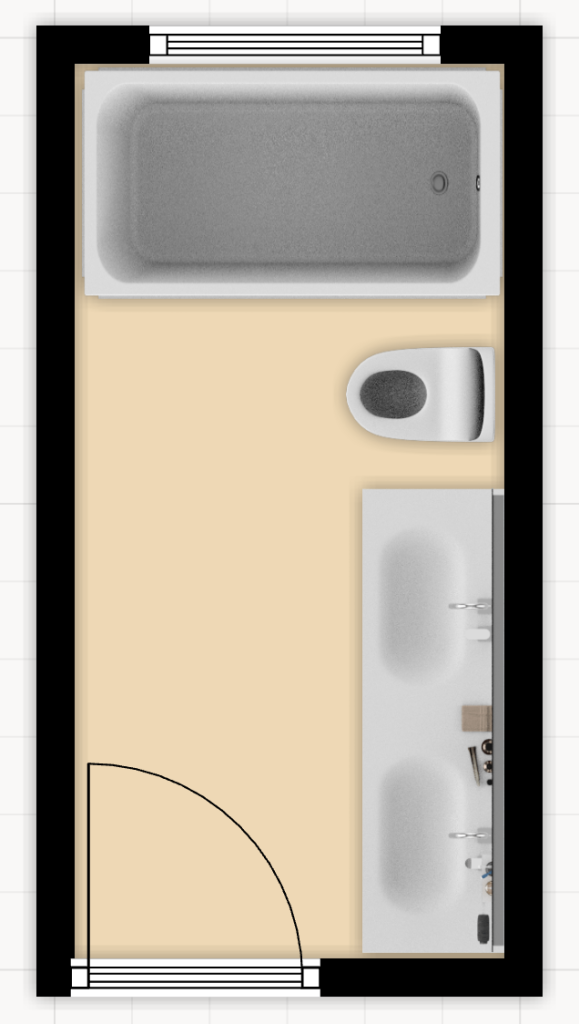
We will also be re-plumbing for wall faucets. This is another added cost, but we’d have to re-plumb for the new vanity anyways, so we figured we’d go for it. Wall faucets are easier to keep clean because you don’t have water pool around them on the counter and they clear up a little bit of counter space. They also fit in perfectly with the villa vibes we’re going for.
The tub and shower area will be very similar to the previous configuration. We’ll replace the tub with one in the same dimensions, add frameless glass doors and keep all of the plumbing on the same wall.
Materials and Finishes
I chose a French Contemporary vanity from RH in a dark, warm wood tone. This is that nod to the European design influences that we like. In order to keep it from leaning too far in that direction, the other finishes in the space will lean more toward the Balinese villa style that we want to be prominent.
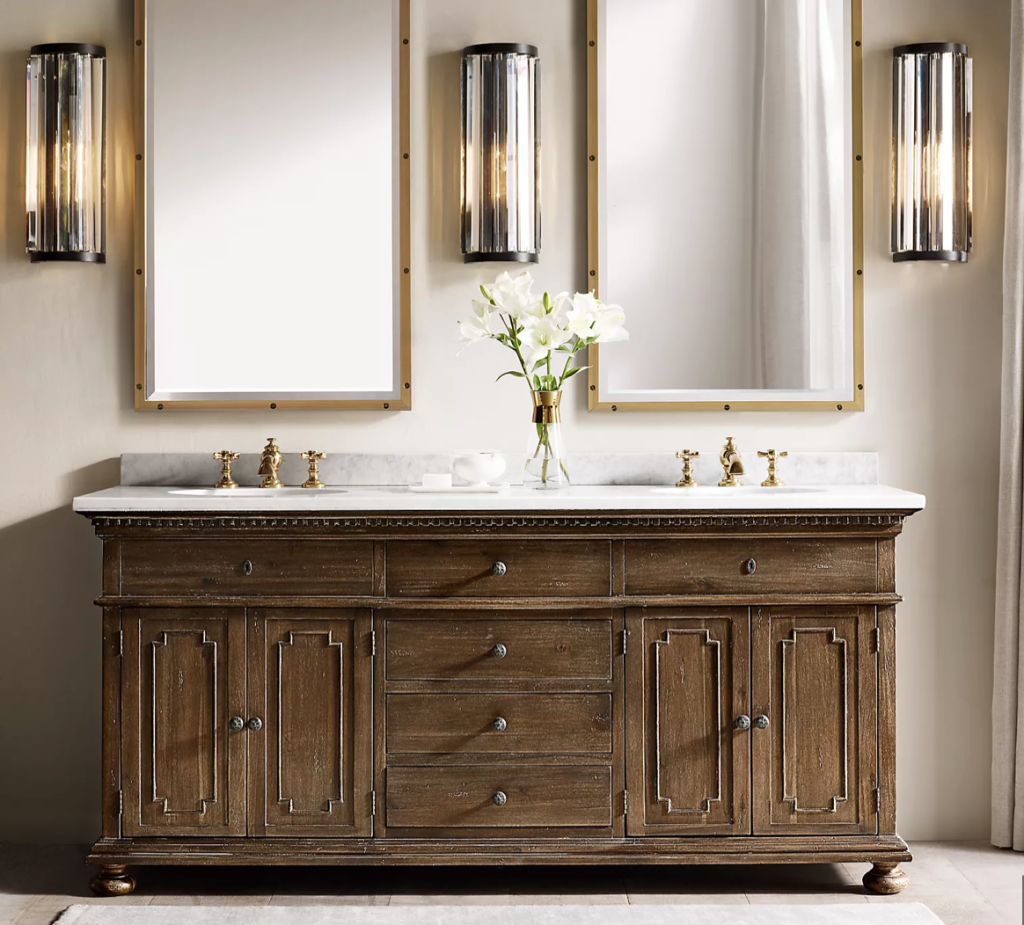
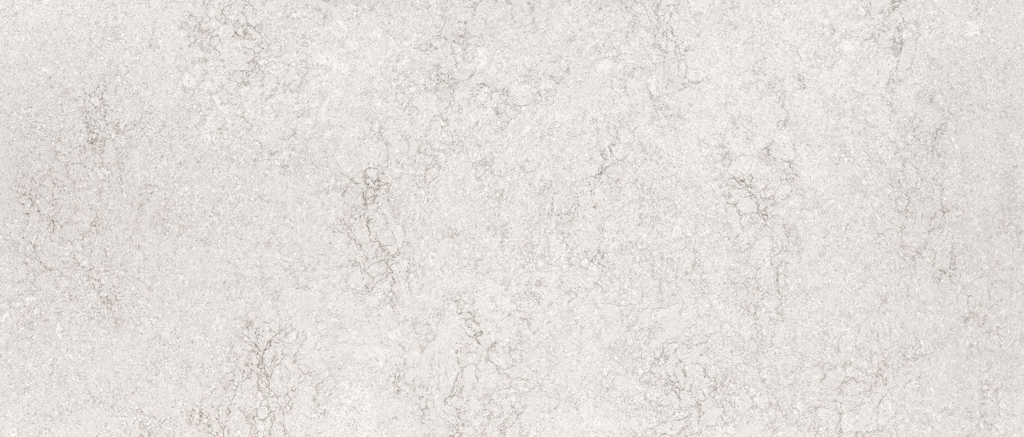
I immediately came across the perfect countertop which is a blend of cool and warm tones. The brown veining matches the vanity perfectly, making it a great tie in. It’s leathered quartz which is flat (no sheen) and has a very slight texture to the surface. It really does feel like the pebbling of leather and has a much softer feel than polished quartz while retaining all of its durable qualities. It’s very organic both in look and feel so it helps tone down the more traditional-looking vanity.
The walls will be finished in a neutral white limewash called Solaris from Portola. I love the health benefits of limewash and it just looks so soft.
The shower walls and flooring still stump us. My original vision was a tumbled limestone in a warm grey but this is expensive and hard to find. As we progress through our project, Brad and I are considering a plaster treatment for the shower walls and possibly cast stone on the floors. This fits right in with our Balinese vision, and because these surfaces make up the largest element of the space, it will help keep the Balinese style as the prominent one.
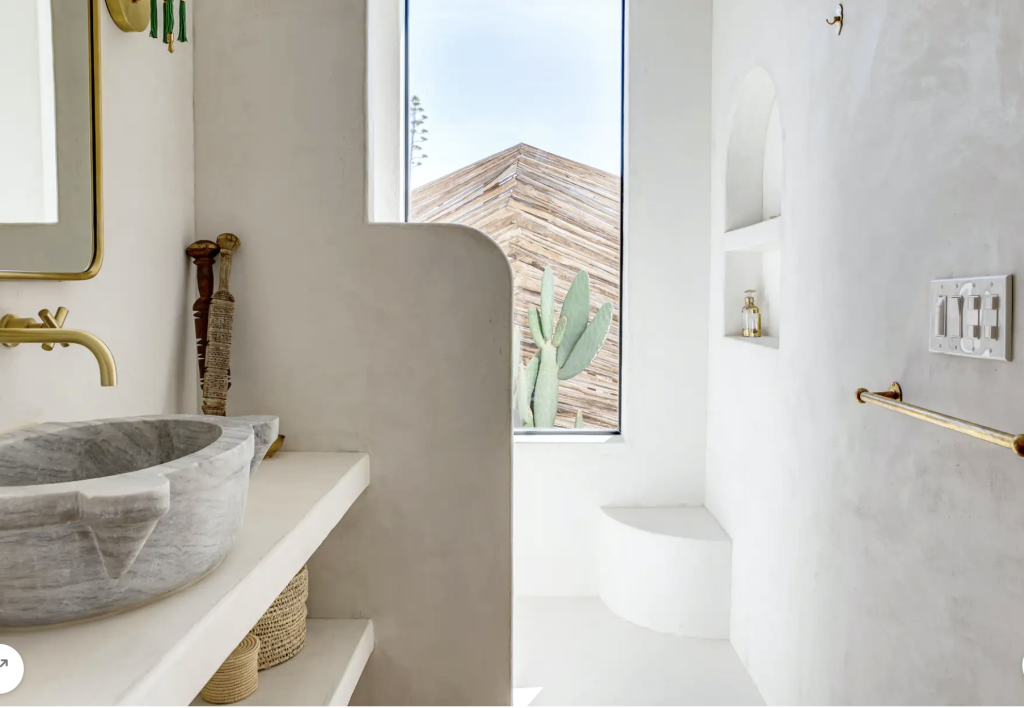
The hardware I ordered is from Atmosphyre and I’m already incredibly impressed with the company. James, the owner, is very attentive and responsive. While the fixtures take some time to make (they are hand made!) he shipped out the valves right away so that our plumbers can keep the project moving along. I opted for shapes that are simple and modern, but with the added character of the muted, aged brass finish.
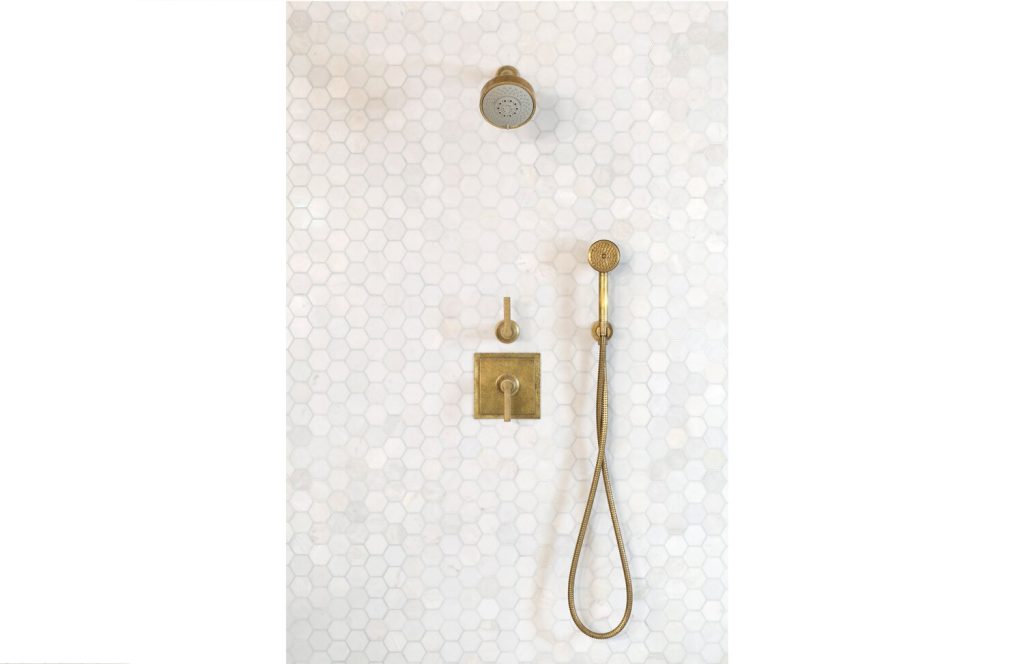
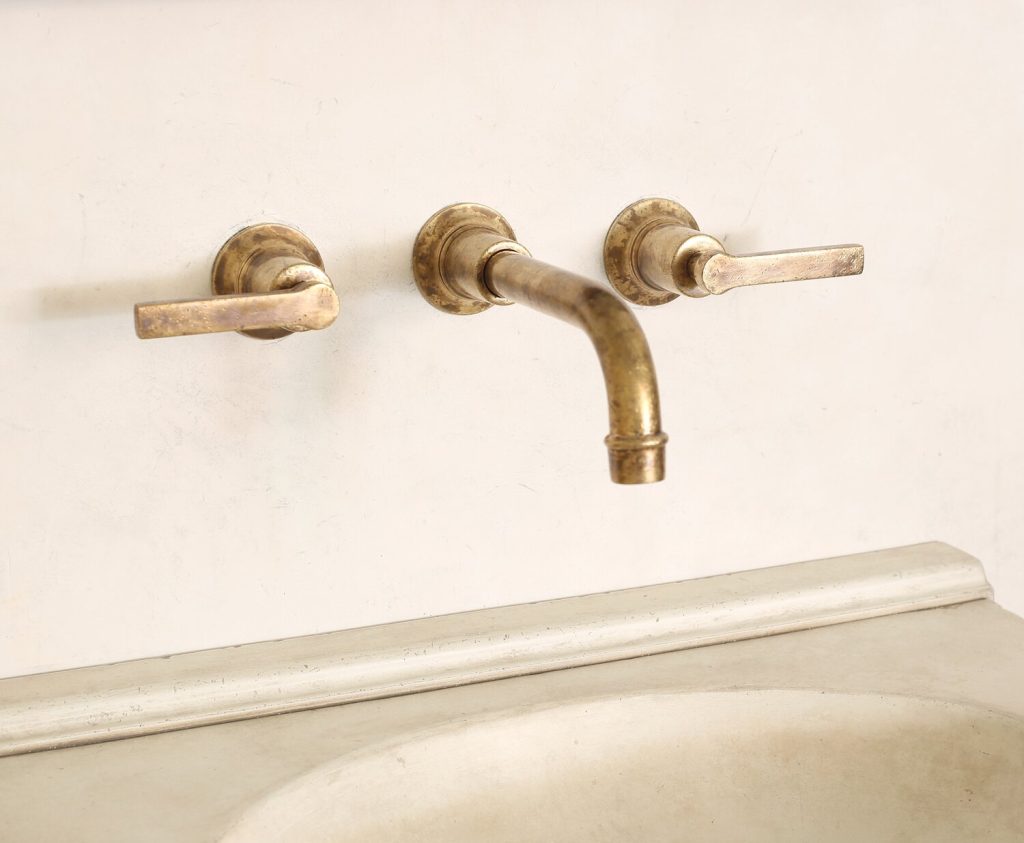
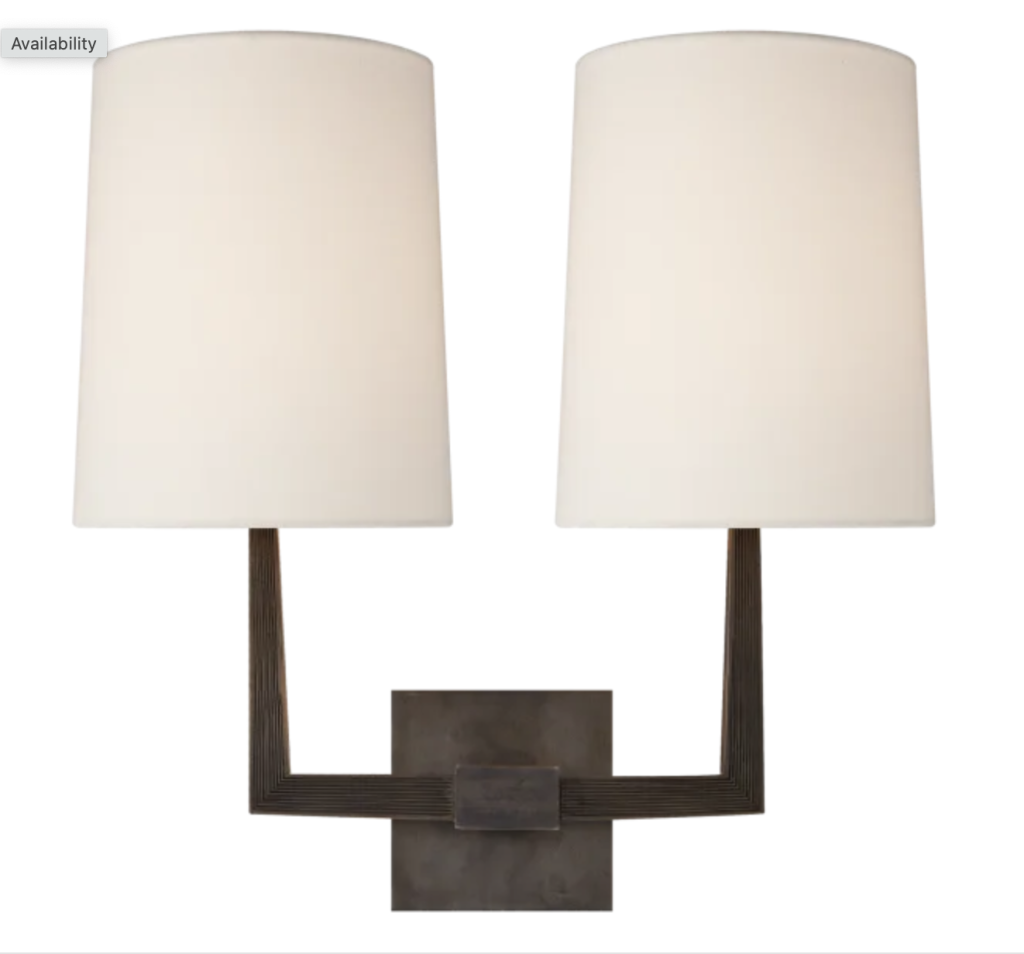
Lighting will come from two sources. We’ll add at least one more recessed light to the ceiling and we’ll add a second layer of lighting with a very large double sconce above the vanity. Again, I chose a piece with a clean, modern shape that is softened by an aged finish. The sconce will be flanked by two tall mirrors, one over each sink.
Tub & Toilet
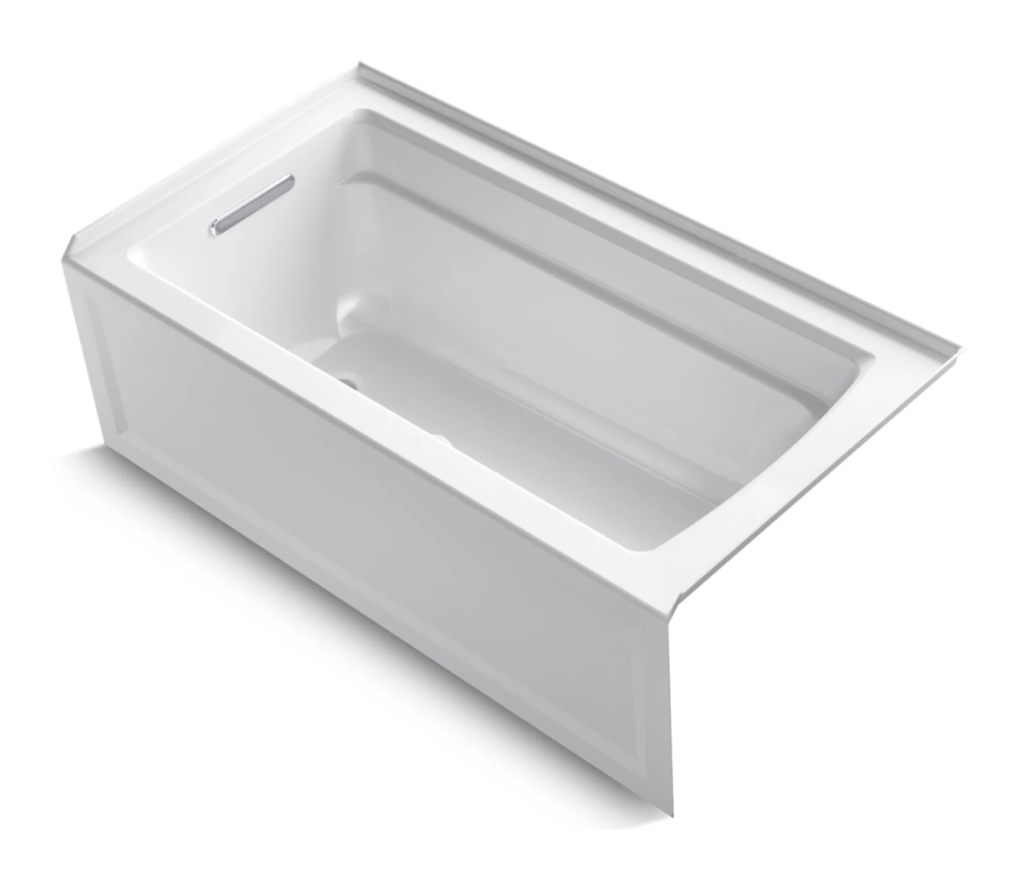
Our tub area is 72″ x 36″ which is a somewhat difficult size to find. I ended up finding only two options and both were acrylic. I have never had an acrylic tub before, so when it arrived, I was shocked that I could lift it myself! I panicked a bit and consulted everyone I knew, including our plumber. I was assured that it was a quality tub and that acrylic is very common and durable. For added support, acrylic tubs are typically set on a mortar bed, which our plumber has plenty of experience with.
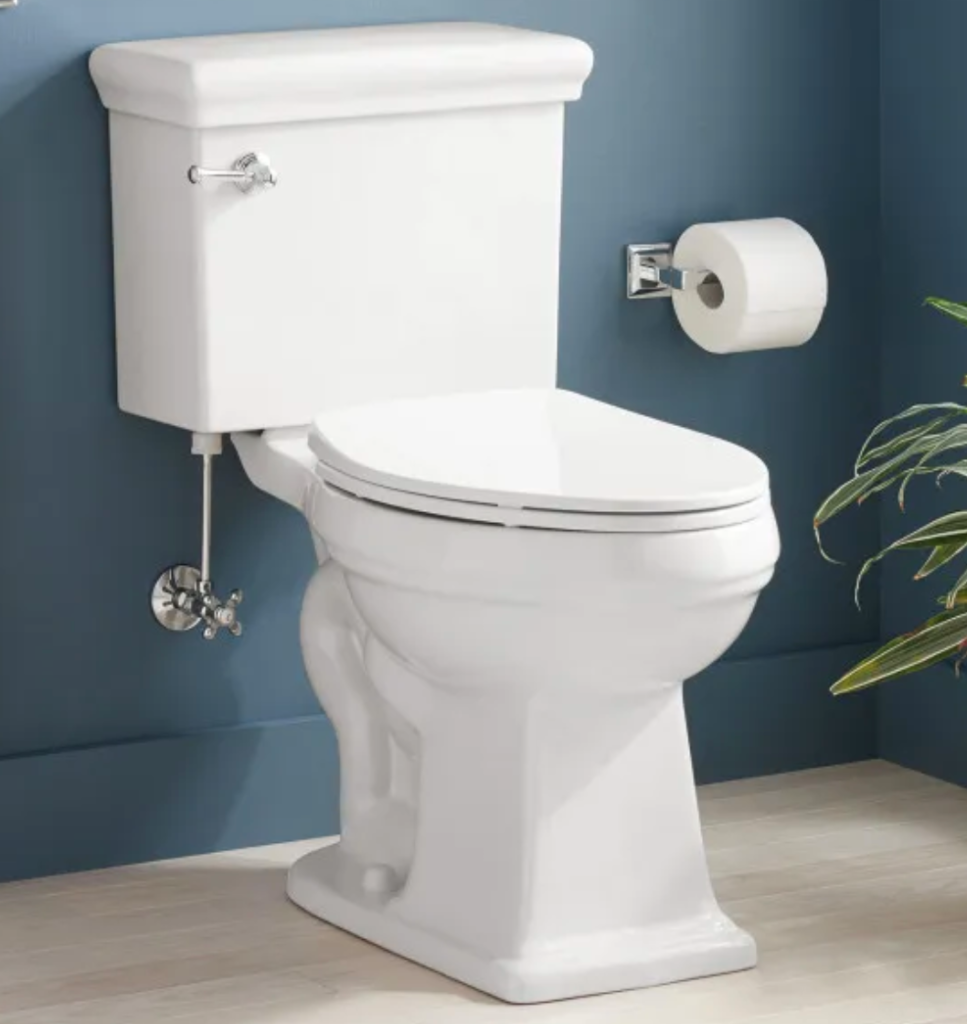
The toilet is the two-piece Key West from Signature Hardware. I had considered one-piece toilets with a dual-flush, but was deterred by the price tag and difficulty of installation. Ultimately, I decided to keep it simple with a standard two-piece, high efficiency toilet. Though I had never previously thought of a toilet as a design element, I chose this one for its classic detailing that fits right in with the West Indies / Spanish style. You can also choose from different metal finishes for the tank handle.
And there you have it! For progress updates, hop on over to Instagram. I’ve saved all of the updates so far to my “Guest Bathroom” story highlights. I can’t wait to share the final reveal!
Bathroom Project To-Do’s
- Full demo
- Move toilet flange
- Repair water damaged framing
- Tub install
- All plumbing rough-ins
- Inspection
- Close up slab (from moving toilet)
- Durock and drywall
- Flooring Install
- Toilet and Vanity Install
- Template for countertops
- Shower wall material install
- Countertop Install
- Plumbing Finish
- Electrical
- Decor install (mirrors, etc.)
- Done!

Looking for more? Subscribe below for my FREE Guide to Decorating
Related Posts
Our 2022 Project Plans
Our 2022 home project plans. Plus a look back at everything we accomplished in 2021…
January 12, 2022© 2020 gold coast canvas. all rights reserved.

Leave A Comment